Creating Seamless Decal Meshes
Creating Seamless Decal Meshes
I’ve talked quite a bit here on Topology Guides about integrating shapes into meshes. But until this point, I’ve overlooked a surprisingly adequate workaround to traditional modeling practices for integrating shapes onto a surface.
This workaround is the process of using “decal” meshes that hover over the surface of a primary mesh, yet seem to be fully integrated once shaded. The method I’m about to show you works mainly for protruding convex parts of an object. Such as a door handle or a button on a workstation.
For this process, all you need is the “decal” object you want to integrate, and the primary “surface” mesh.
Note: For smaller or concave decals, I highly recommend checking out DECALmachine. It’s a fantastic add-on that’s been spreading like wildfire in the Blender community the past few months.
Start Simple
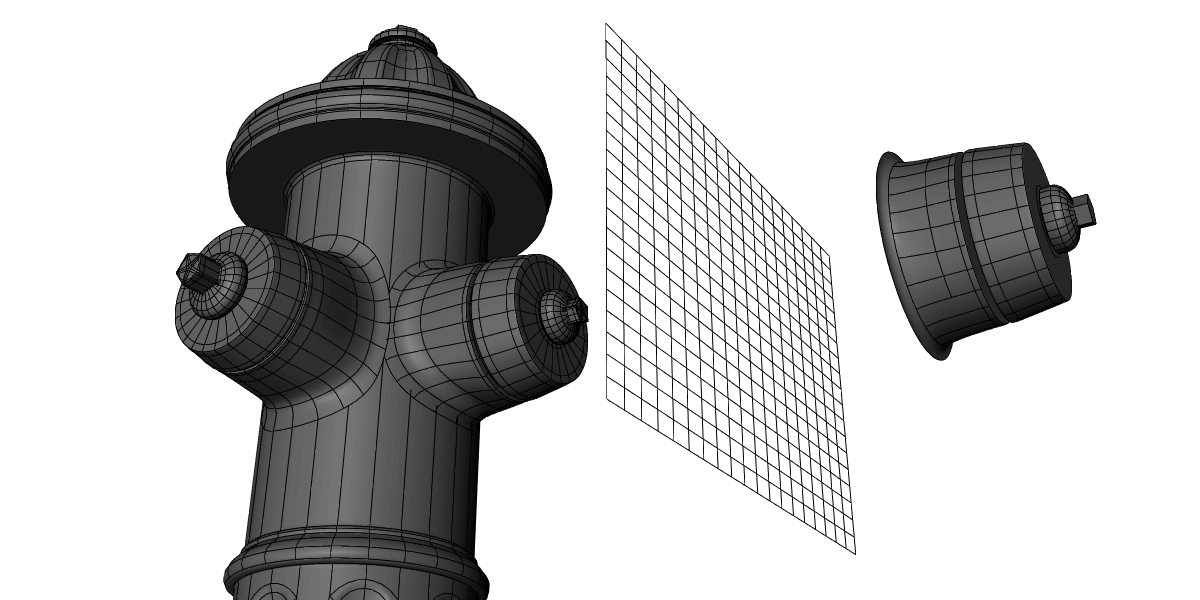
In addition to the decal and surface we’re using, we’ll also need a 2d lattice roughly in the shape of the bottom of the decal. Along with that, be sure that the decal has a bottom rim with some type of bevel to make sure there’s a smooth transmission between the decal and surface in the later stages.
Once you have all these elements, lay them out in a similar fashion to the screenshot above before you move on to adding vertex groups.
Vertex Groups
We’ll need two vertex groups to get the decal working properly. One for the very outer rim of the decal, and another for the larger area around the base of the decal.
We’ll use these groups later for deforming the decal to the surface using a variety of methods for mesh deformation.
Using Lattices
After laying out the lattice and decal over the surface, you can start to use the lattice to shape the decal.
Start by applying the lattice to the decal using the lattice modifier. Now the lattice has total control over the decal, which isn’t quite what we want, so we’ll need to use the larger vertex group we created earlier to make sure the lattice deforms only the bottom areas of the decal.
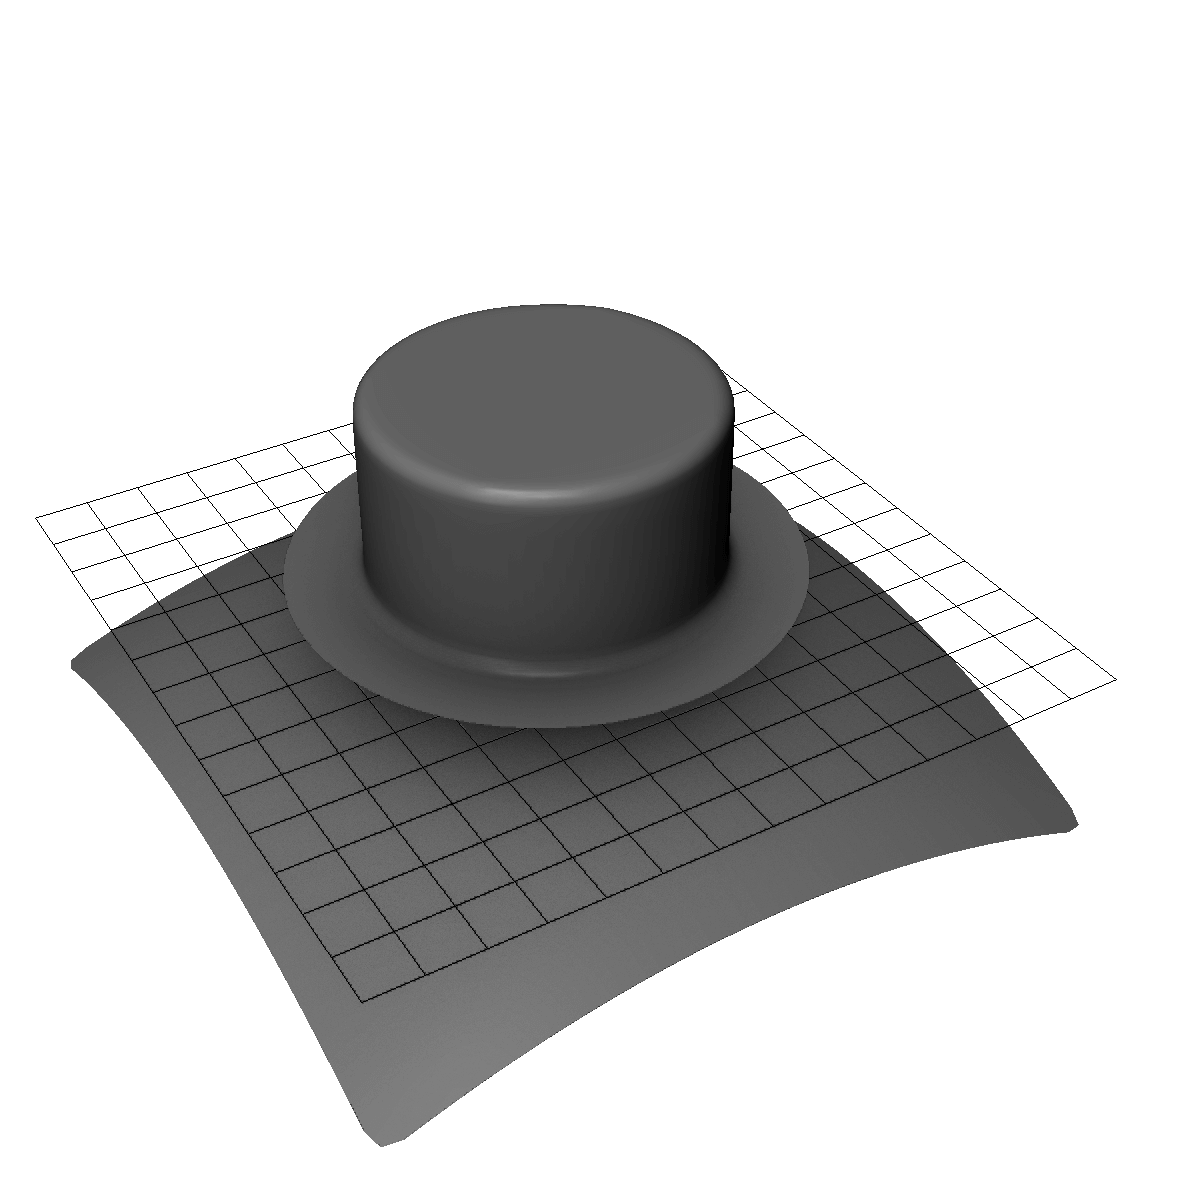
After the decal is joined to the lattice, apply a shrinkwrap modifier to the lattice with the surface as the target. This should give a rough version of the final outcome. But don’t quit yet, there’s still a lot of perfecting to do.
Perfecting the Shape
To perfect the surface, the outer rim still needs to be adjusted. Otherwise, at certain low viewing angles, we can sometimes still see a slight gap between the two surfaces. Of course, if this gap isn’t visible on whatever model you’re using, then you can go skip this.
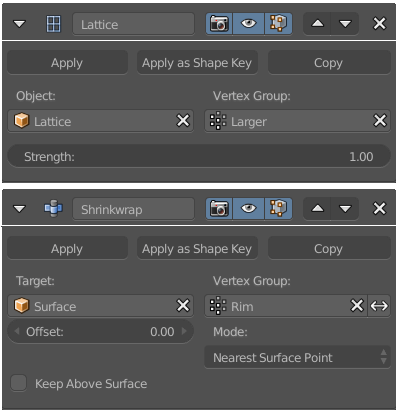
To adjust the rim, apply a shrinkwrap modifier to the decal with the surface as the target. Next, select the rim vertex group to make sure only the rim is affected.
Correcting Normals
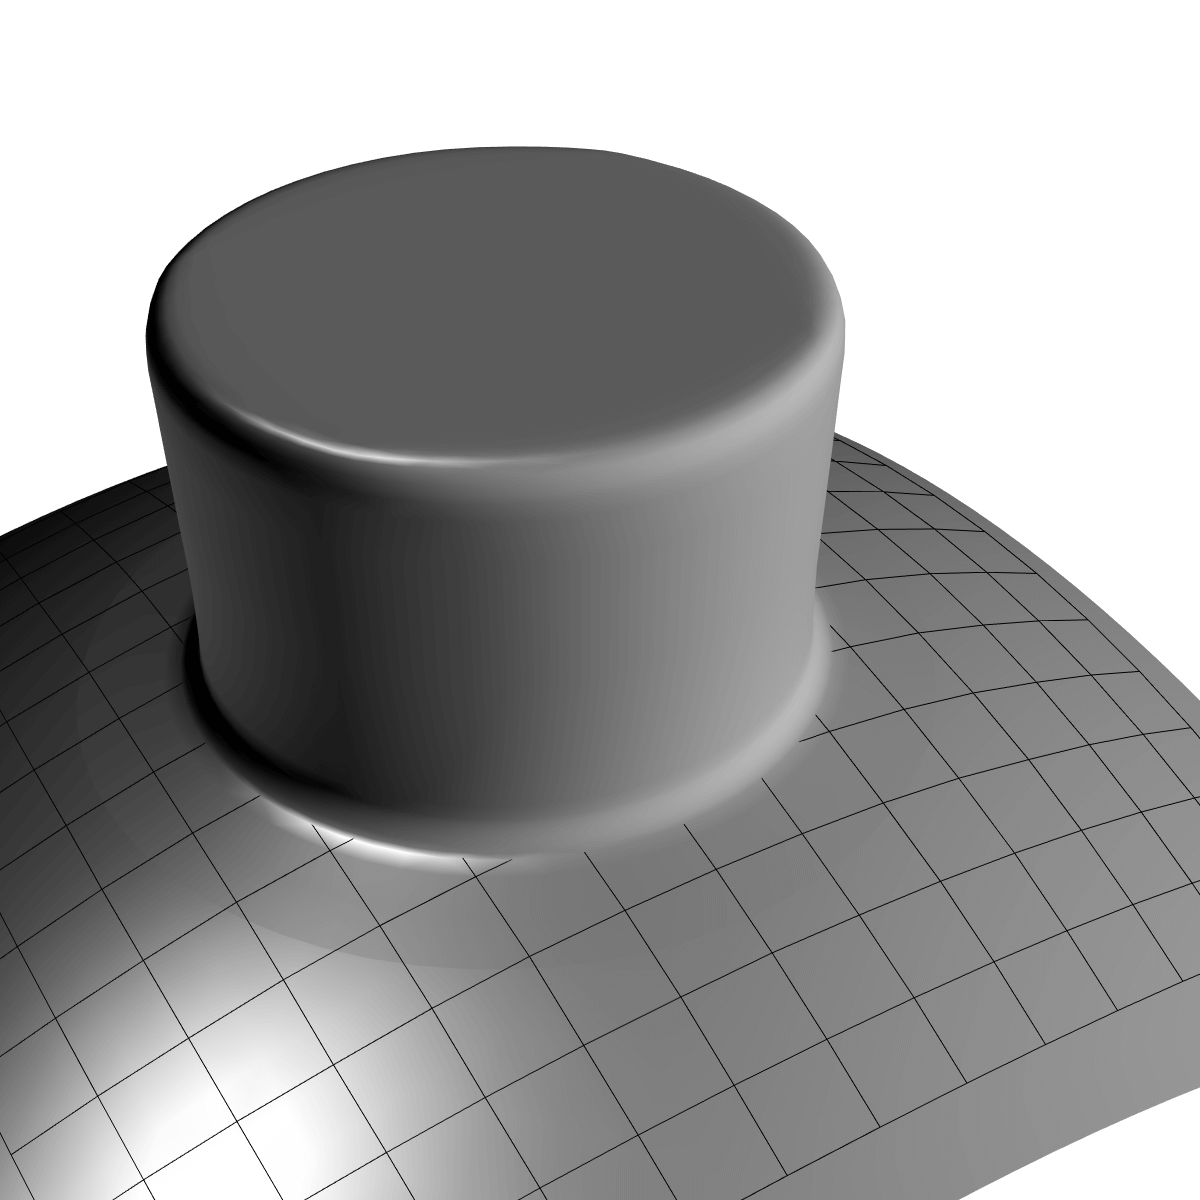
At this point, you should have an almost perfect mesh uniform to the target surface, apart from some shading artifacts. If not, come back to this step later and have a look at the troubleshooting tips below.
If it all looks good, all that’s left is to apply some normal editing hacks to smooth out the shading. Again, this is also a very picky detail so you might be able to get away with skipping it if you’re not doing close-up renderings.
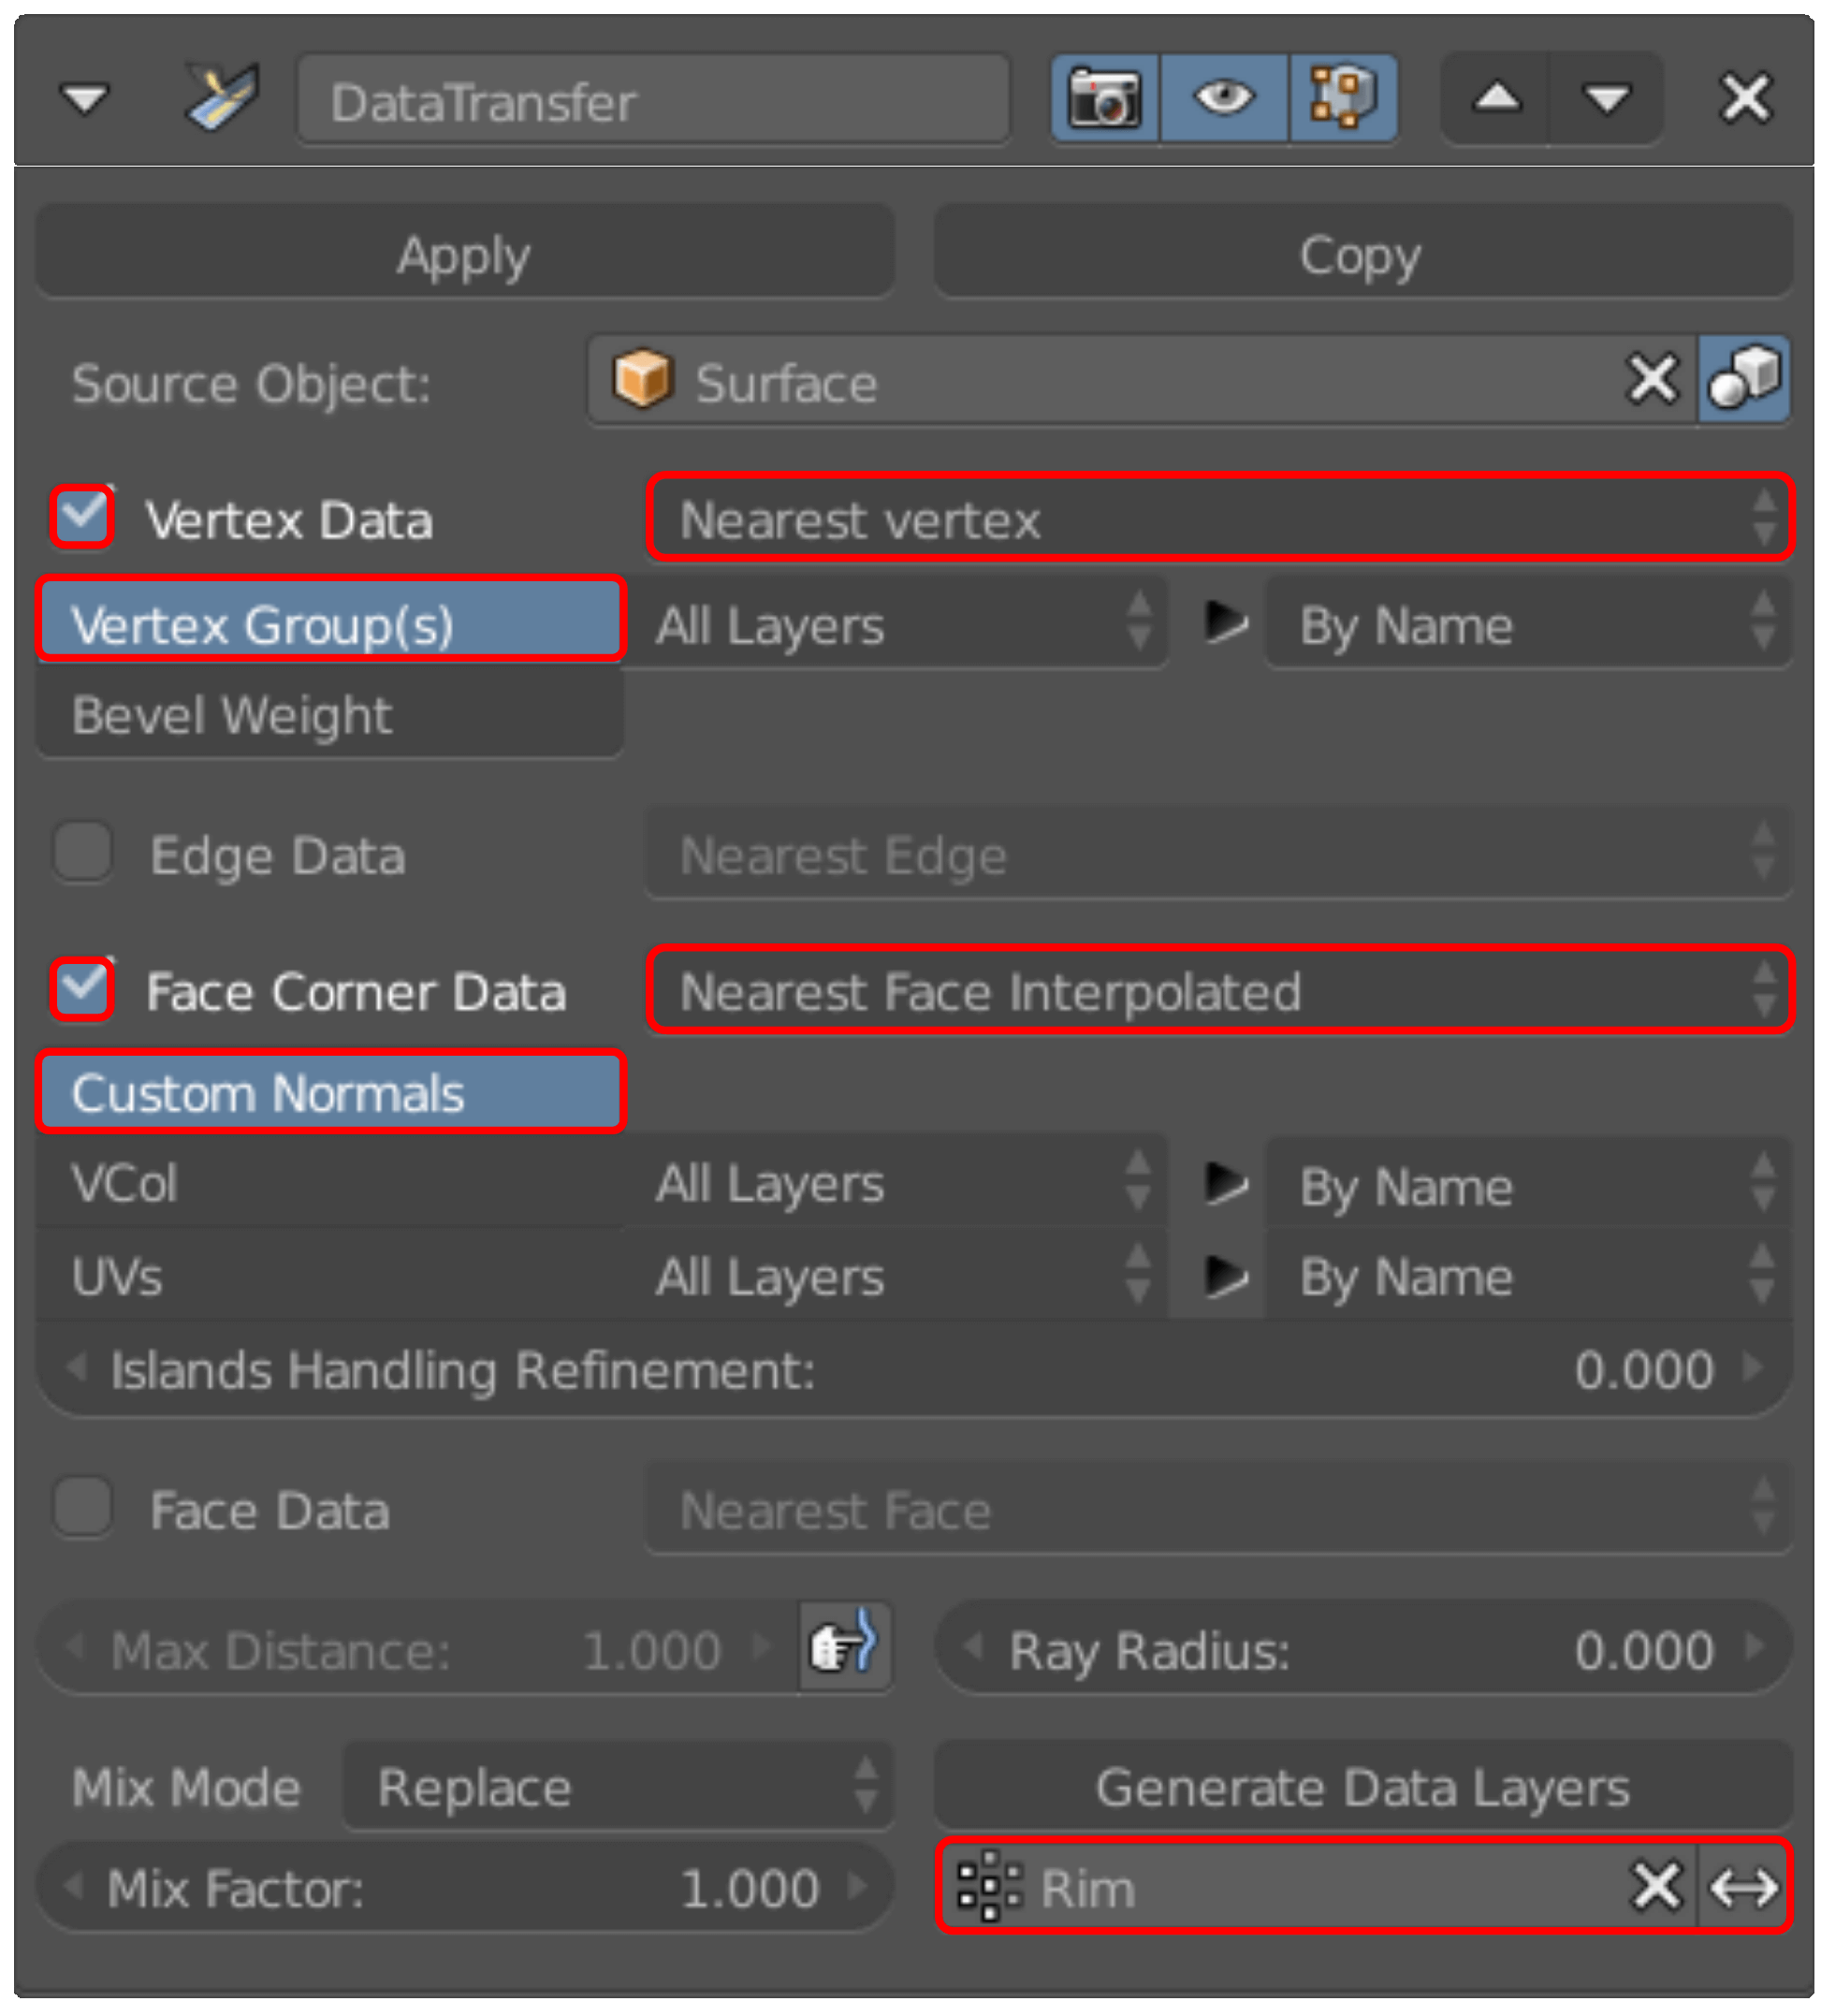
Start by adding a Data Transfer modifier with the surface as the target. Then you can set the settings as shown in the screenshot and click Generate Data Layers near the bottom of the modifier.
To briefly explain what’s going on here, the data transfer modifier can copy the normal information from the surface model and apply it to the decal. Which makes the Render Engine (or viewport) view the two models as a seamless surface. Of course, this only works if the two meshes are approximately in the same location, hence the need for the previous steps in this guide.
Troubleshooting
If everything went smoothly, great! If not, don’t worry, here are some tips that might help.
Origin Points
Having the origin points of the lattice and decal in the same spot is best when possible. Otherwise, sometimes the decal will not deform with the lattice correctly.
Applying Transforms
Make sure to apply the scale of all objects using CTRL-A.
Setting the Rim Shrinkwrap
If you notice a shadow under the decal, it’s most likely because there’s still a small gap between the surfaces. Adjusting the offset of the shrinkwrap can often solve it. This applies to intercepting pieces as well.
Tweak Data Transfer
If you’re having problems with the edge of the decal shading properly, try tweaking the settings of the Data Transfer modifier. Often times its normals that cause seemingly unsolvable problems. Don’t overlook them.
Still having Problems?
If you’re still having problems, I’ve uploaded an example file herethat has all the settings and modifiers laid out. So if all else fails, you can consult the file for help. ;)
That’s it! I hope this guide was useful. If it was, please consider making a small per-post donation to my Patreon page to support my work here on Topology Guides. I’d really appreciate it. :)
Happy Modeling!