Modeling with Animation in Mind
You just sculpted a new character concept, retopologized it, and added an armature…but then you move a bone and realize that your topology just doesn’t work as you’d hoped it would. Organic, stretching surfaces such as skin require carefully crafted topology that deforms well in a wide range of poses. Accounting for this variability is not an easy task, especially if you’re not skilled in animation or used to working with characters.
So, with this in mind, I’ve prepared a few tips from my own experiences of modeling for animation. With some practice, your topology may be able to work just as well when animated as it does when in a T-pose.
Align Faces with the Axis of Rotation
First up, face alignment. Aligning edge loops to the axis of animation can prevent faces from distorting and causing unwanted shading artifacts by ensuring that faces stay flat, even in extreme poses. In most cases, your topology will naturally align to the axis of animation. For example, an elbow will naturally have edge loops that flow in the same axis as movement. But paying special attention to how your loops flow can help in some tricky situations.
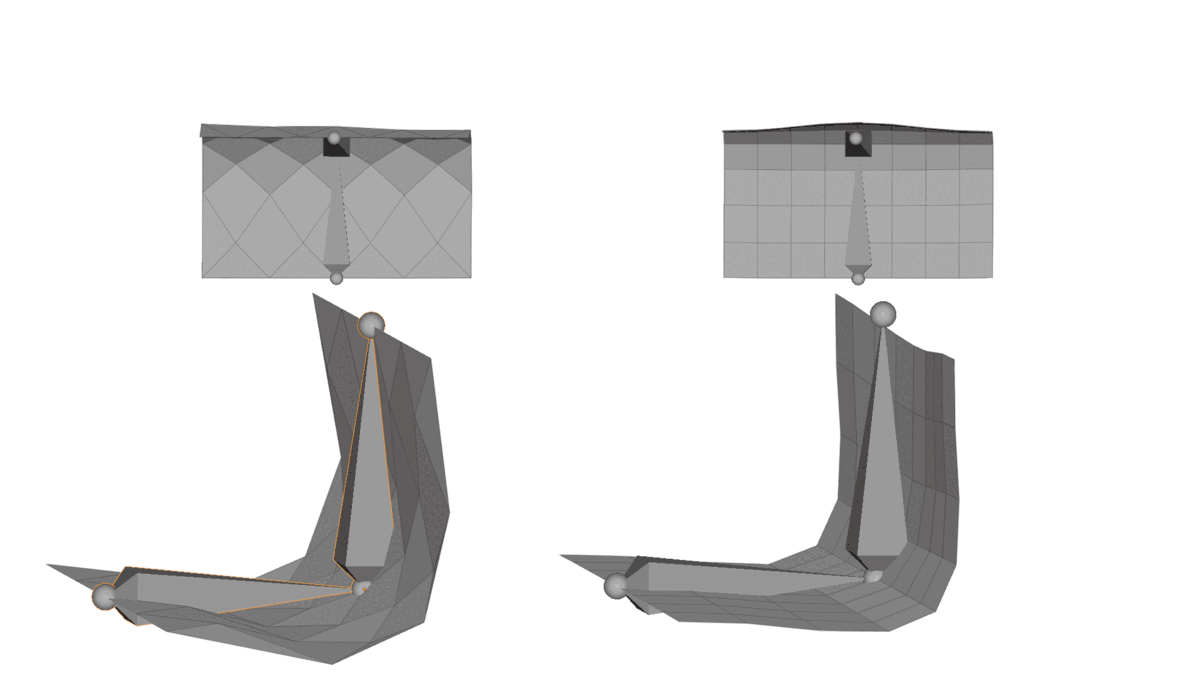
Notice how the faces become non-planar (flat) when they are deformed against the flow of the edge loops. At render, these faces are split into triangles that create an odd ribbed pattern countering the animator’s intent.
Keeping faces flat is the basis of why topology is important in the first place. This is why good topology in-game models is less vital (triangles are almost always flat!), and using n-gons ion modeling can be problematic. The more points you have to work with on a face, the more likely it is that you will have a non-planar surface.
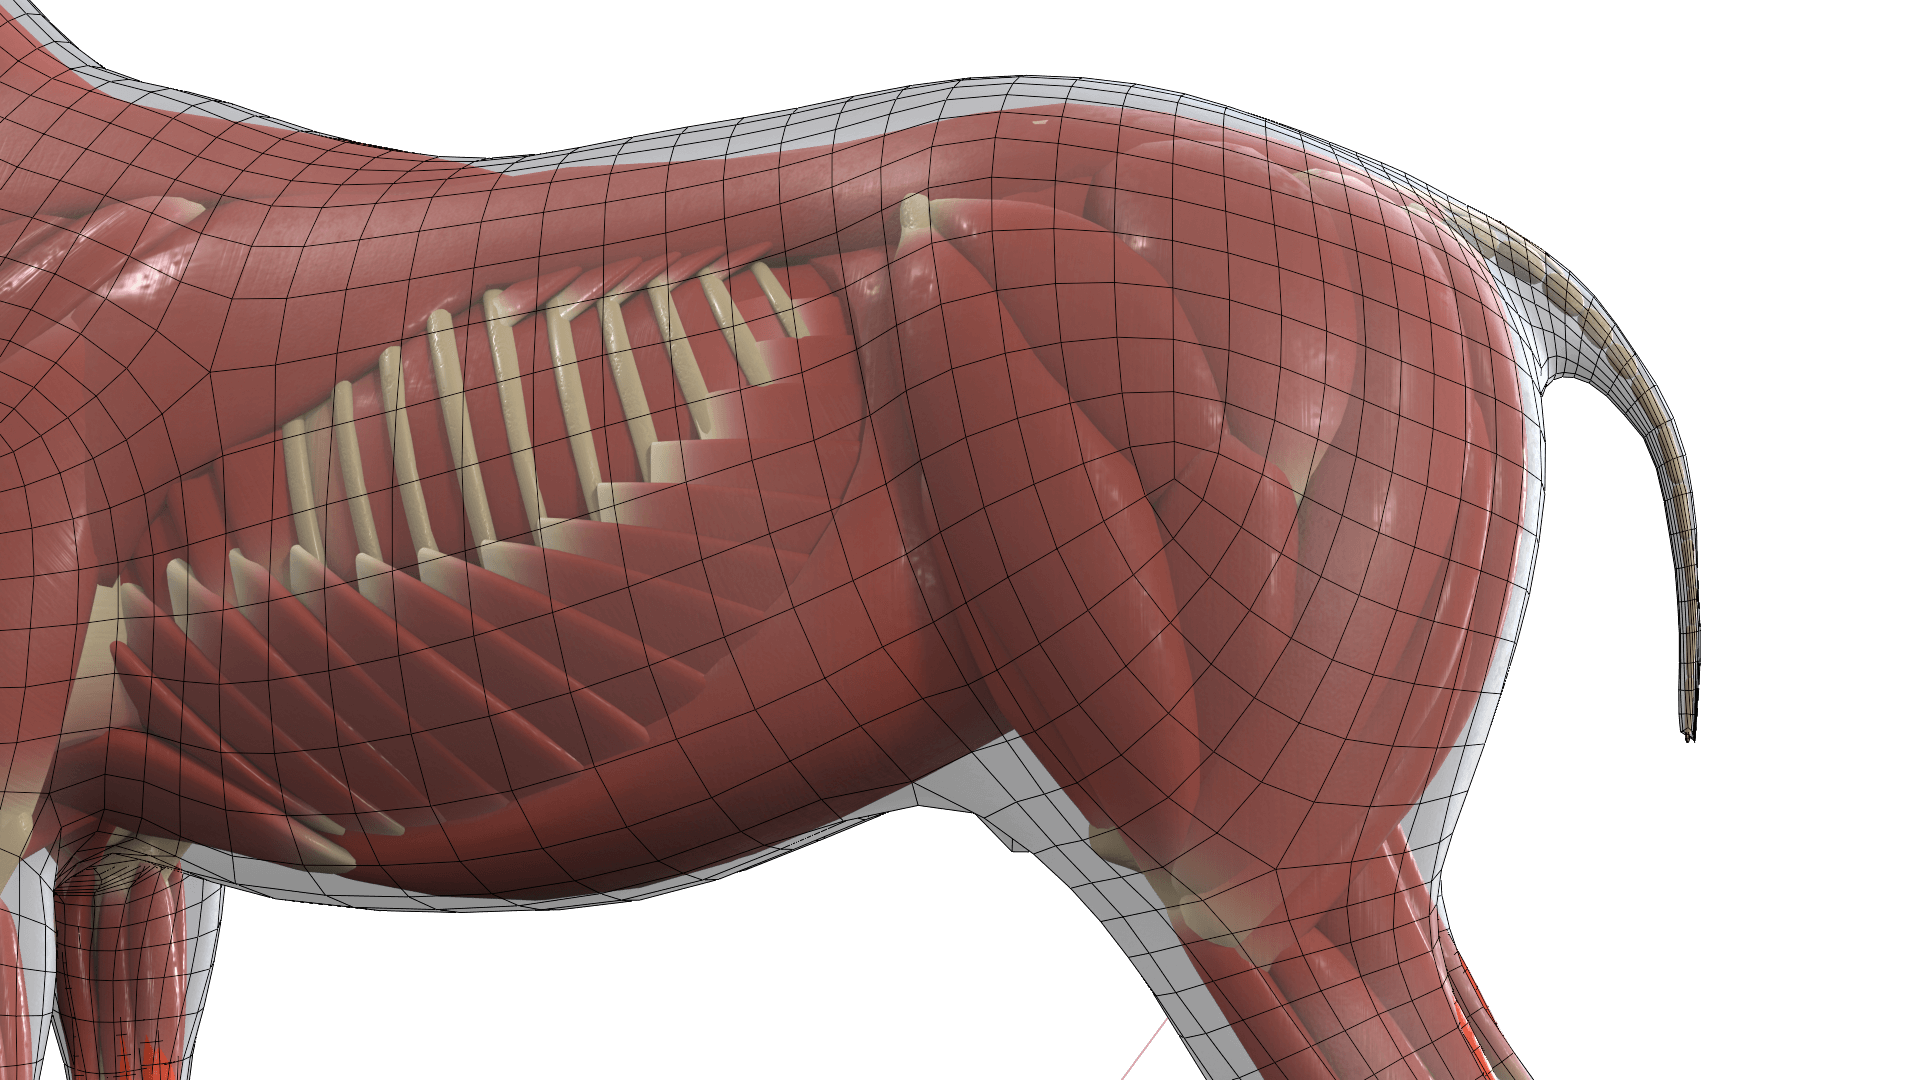
Another tip for organic models is to follow the muscle structures of the deformation point you are modeling. If your topology roughly matches the underlying muscle structure, in most cases, the animated model will push and pull vertices along the same axis of the muscles.
Move Problems To Reduce Artifacts
Even the best models have areas that don’t deform well. Sometimes, the key to solving these issues isn’t eliminating them but moving them. For example, 5+ edge poles cannot be completely eliminated from a complex model, but moving them can help significantly reduce the problems poles cause. By the way, you can read more about moving edge poles in our article “Moving and Manipulating Edge Poles”
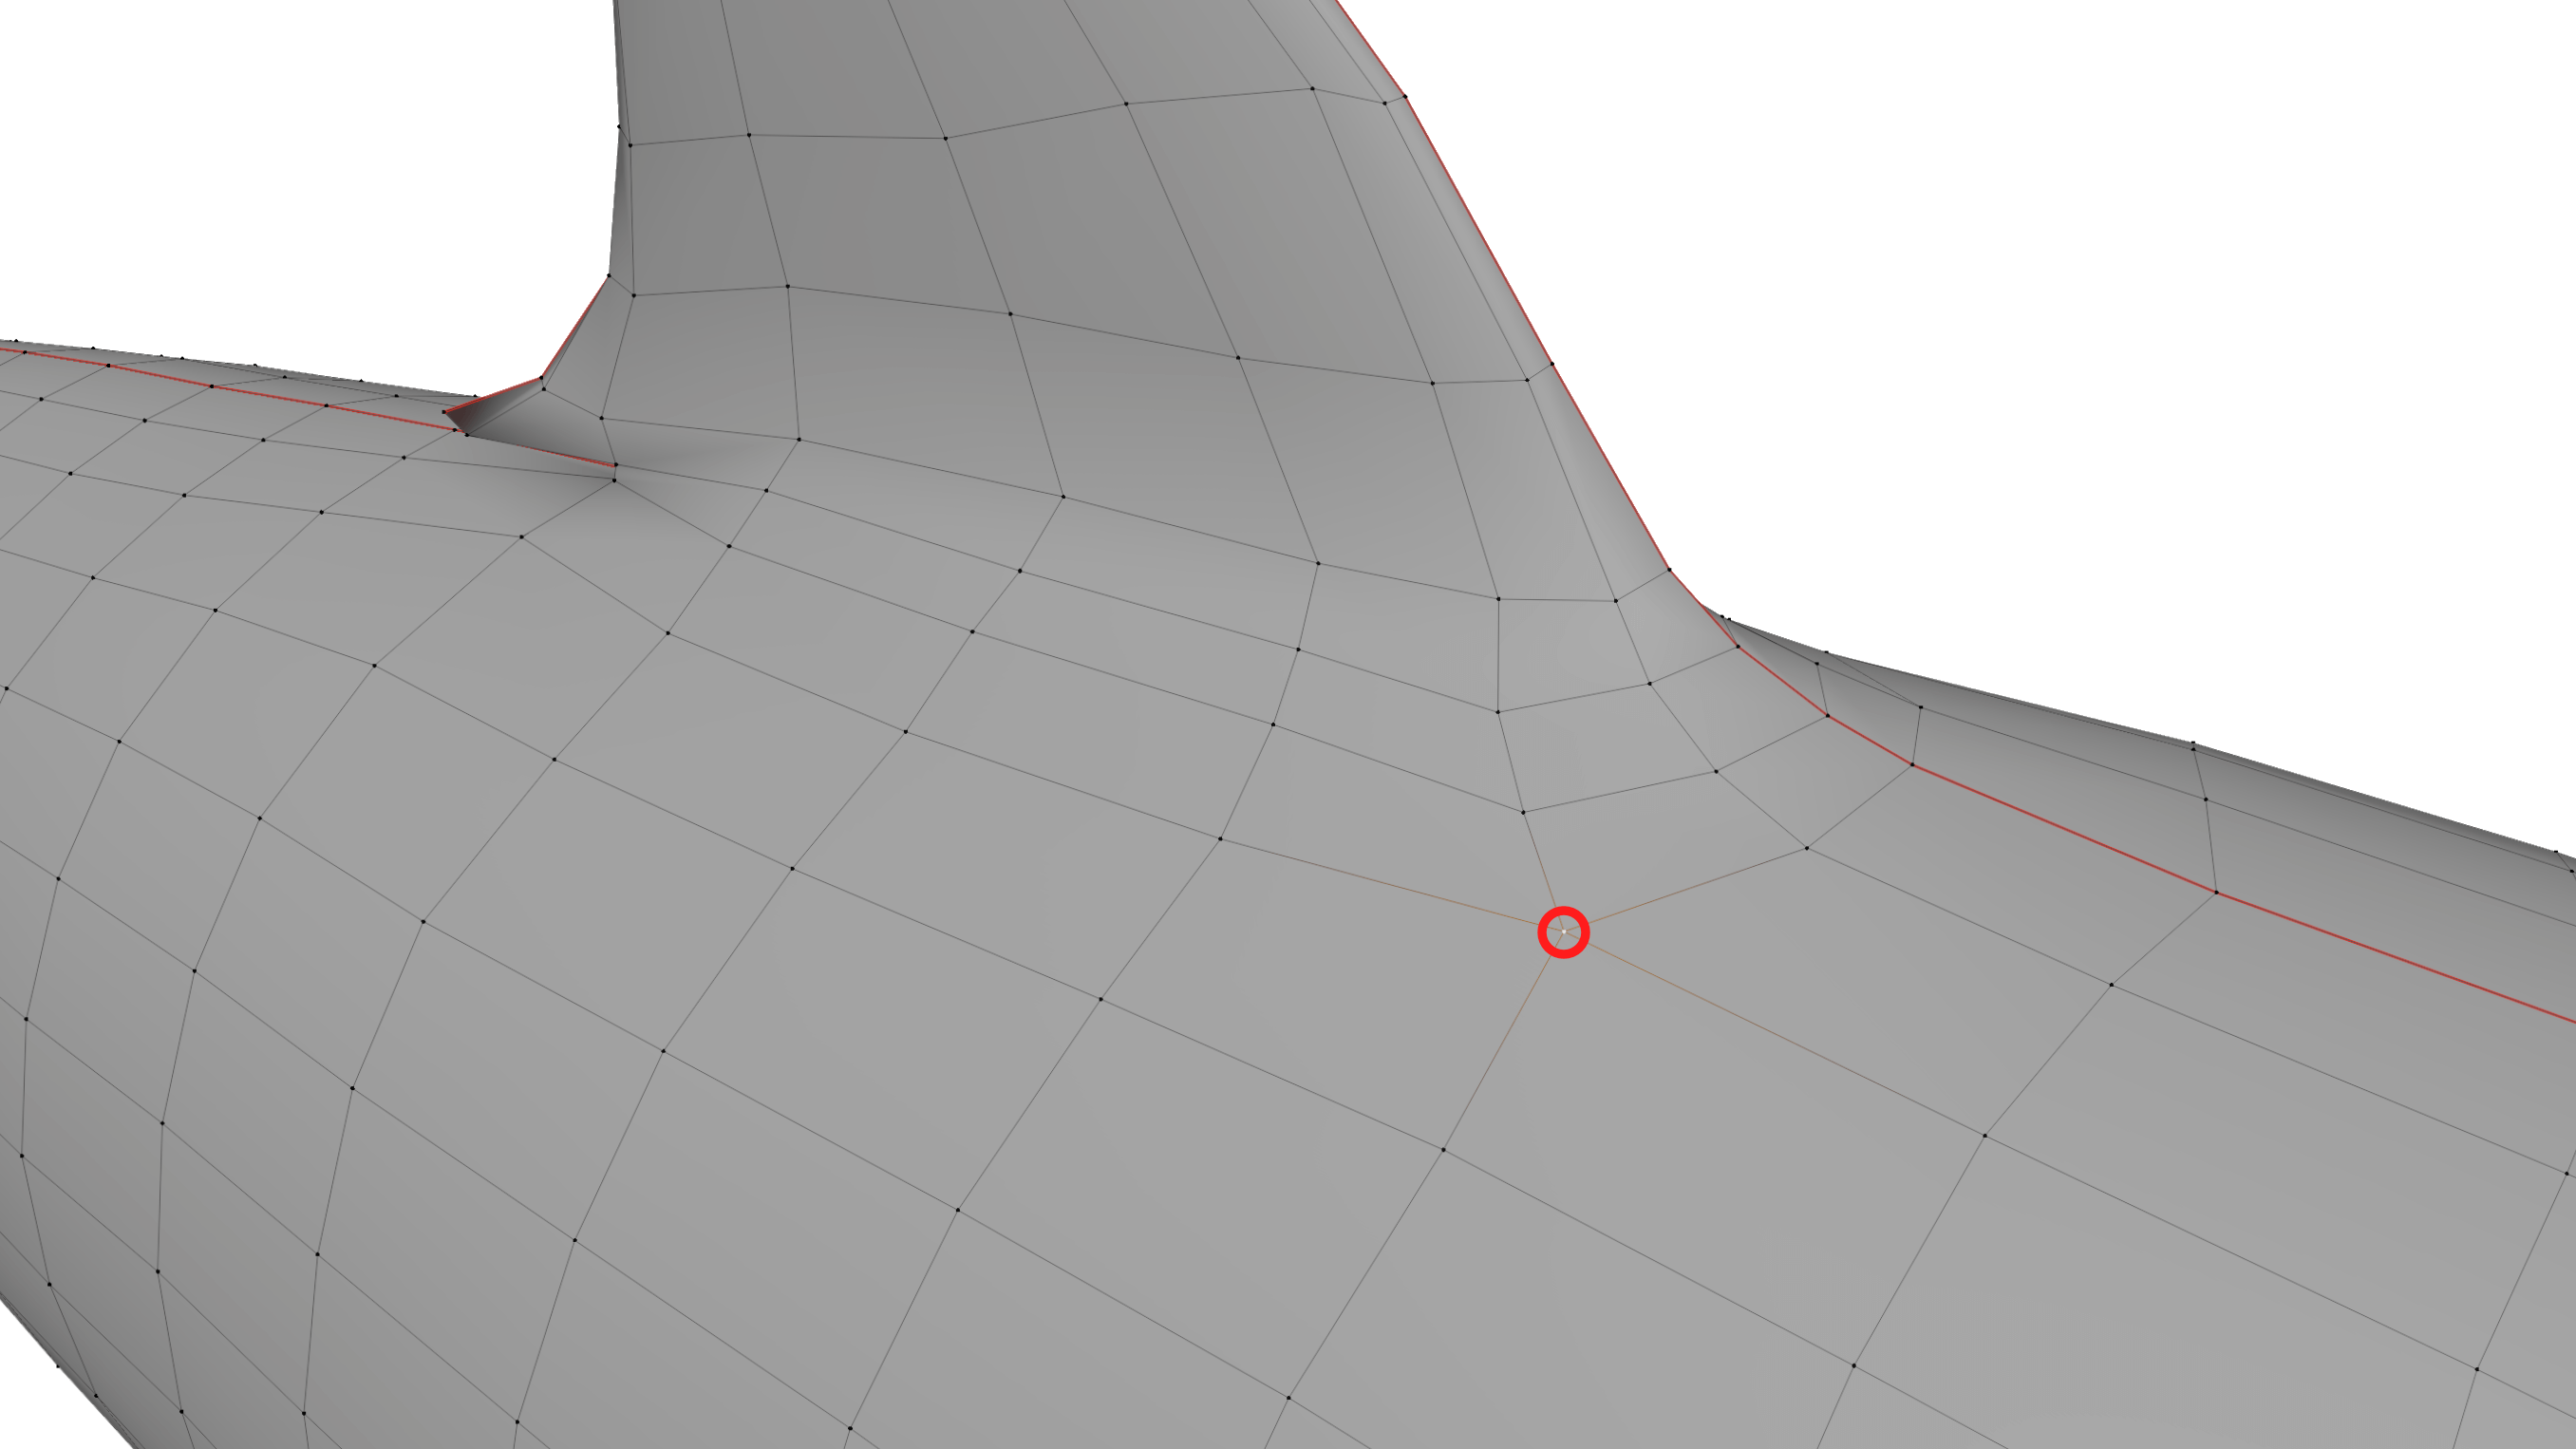
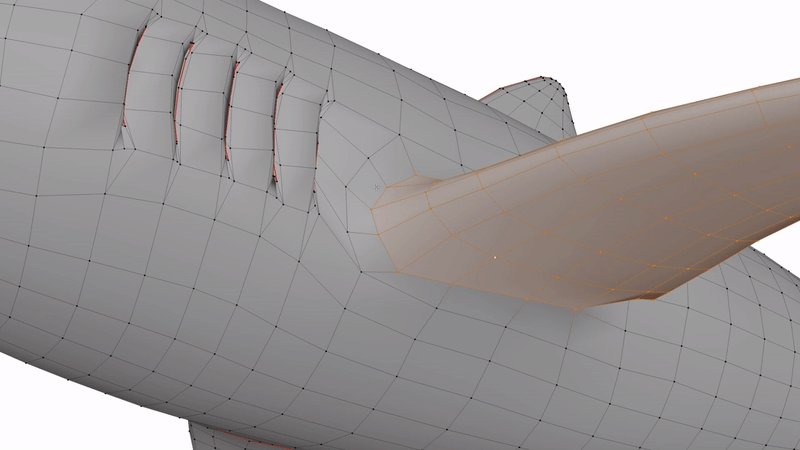
Moving problem topology to areas with less deformation can make issues irrelevant in practical use. Moving an n-gon to a flat surface of your model can make it practically invisible in your final animation. See above how the edge pole is not in the corner of the shark fin? Instead of placing the pole where it naturally would be, the pole is moved out towards a neutral position where it will not interfere with the movement of the fin.
Extend Loops around the Insertion Point
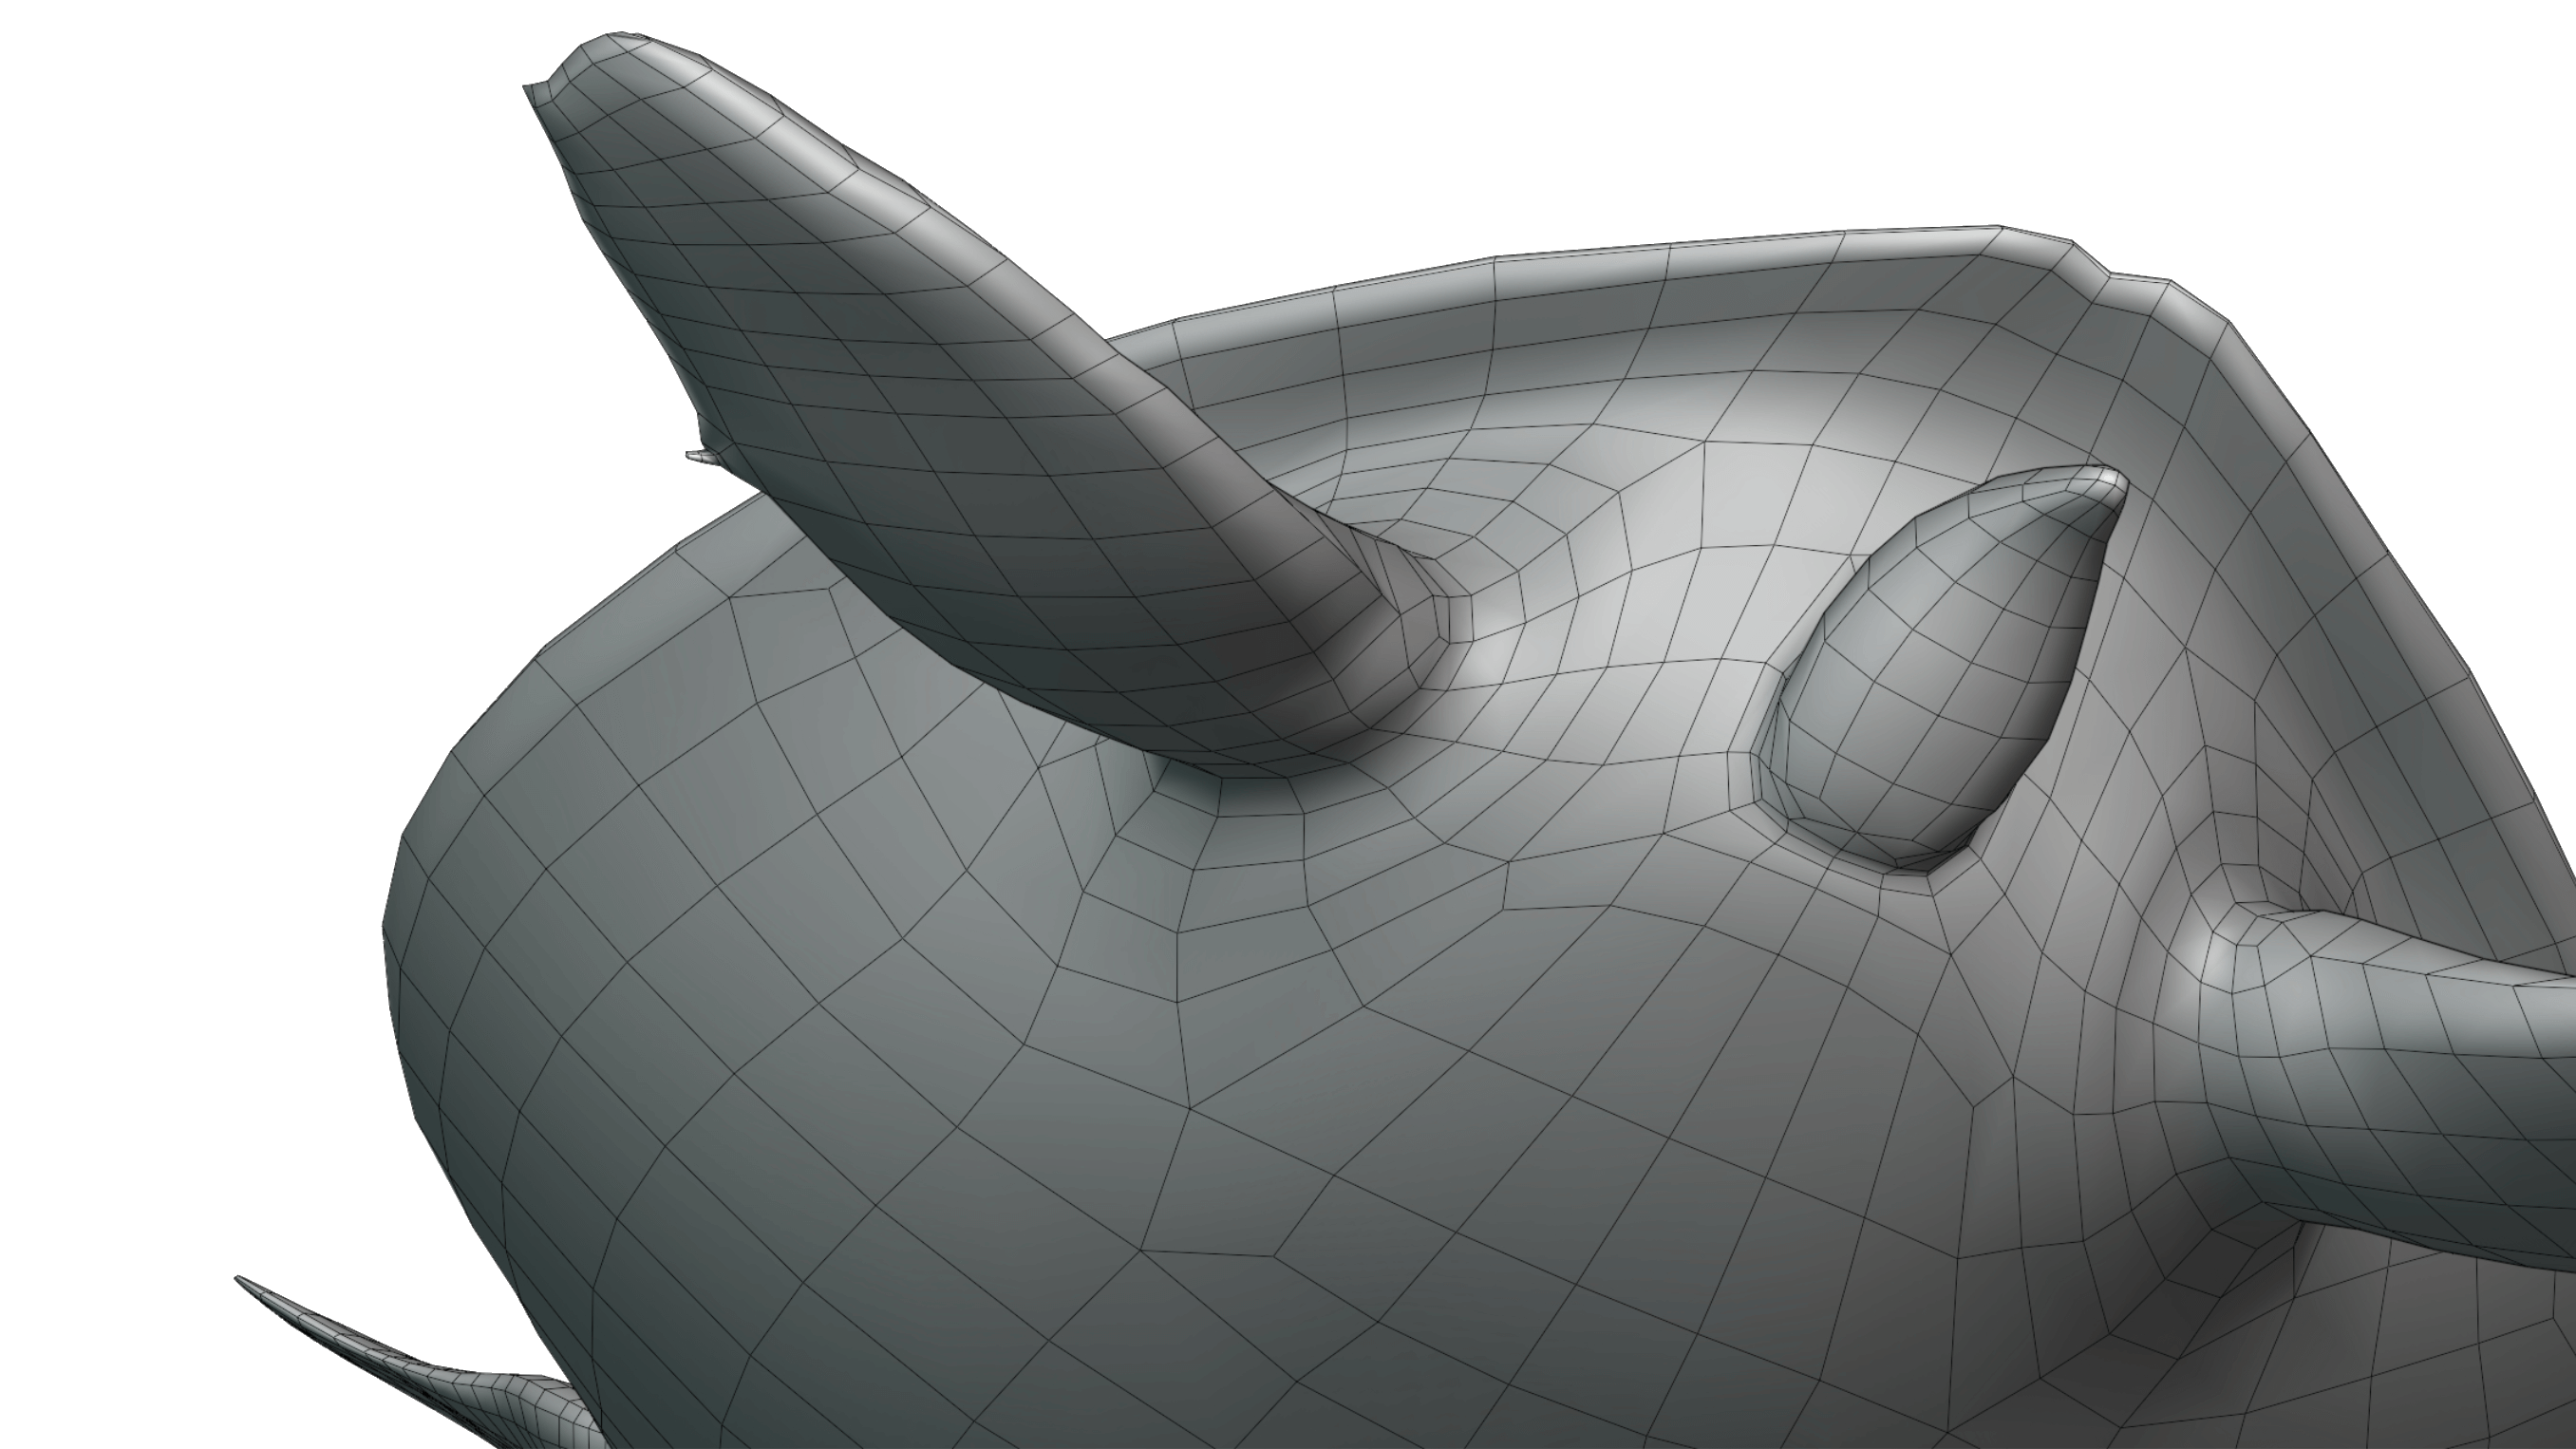
Using extra edge loops in areas with heavy deformation is the easiest way to prepare your model for rigging/animation. In transition areas and muscle insertion points, extending loops past the deformation area into the flat surface of your model can allow joints to deform more naturally and be much easier to weight in rigging. In the case above, the turtle’s fin can now rotate to extreme angles without issues because of the extra loops. Pairing this with moving poles towards flat surfaces can solve many deformation problems.
In Blender, you can easily create extra loops around the insertion point of a deformation point by using the outset tool. Select a face loop and press “I” then “O” to create a ring of faces outside the selected faces.
Match Density with Movement Areas
If polygon counts are an issue, modeling deforming areas of your model (e.g., a character model’s face) with a higher density than non-deforming areas can help to reduce polygon counts without sacrificing good topology. For example, using edge loop reduction techniques, you can add density to your model’s key features and terminate edge loops before less key areas. While modeling with even mesh density can be a virtue, varying mesh density can be a lifesaver when working on heavy models.
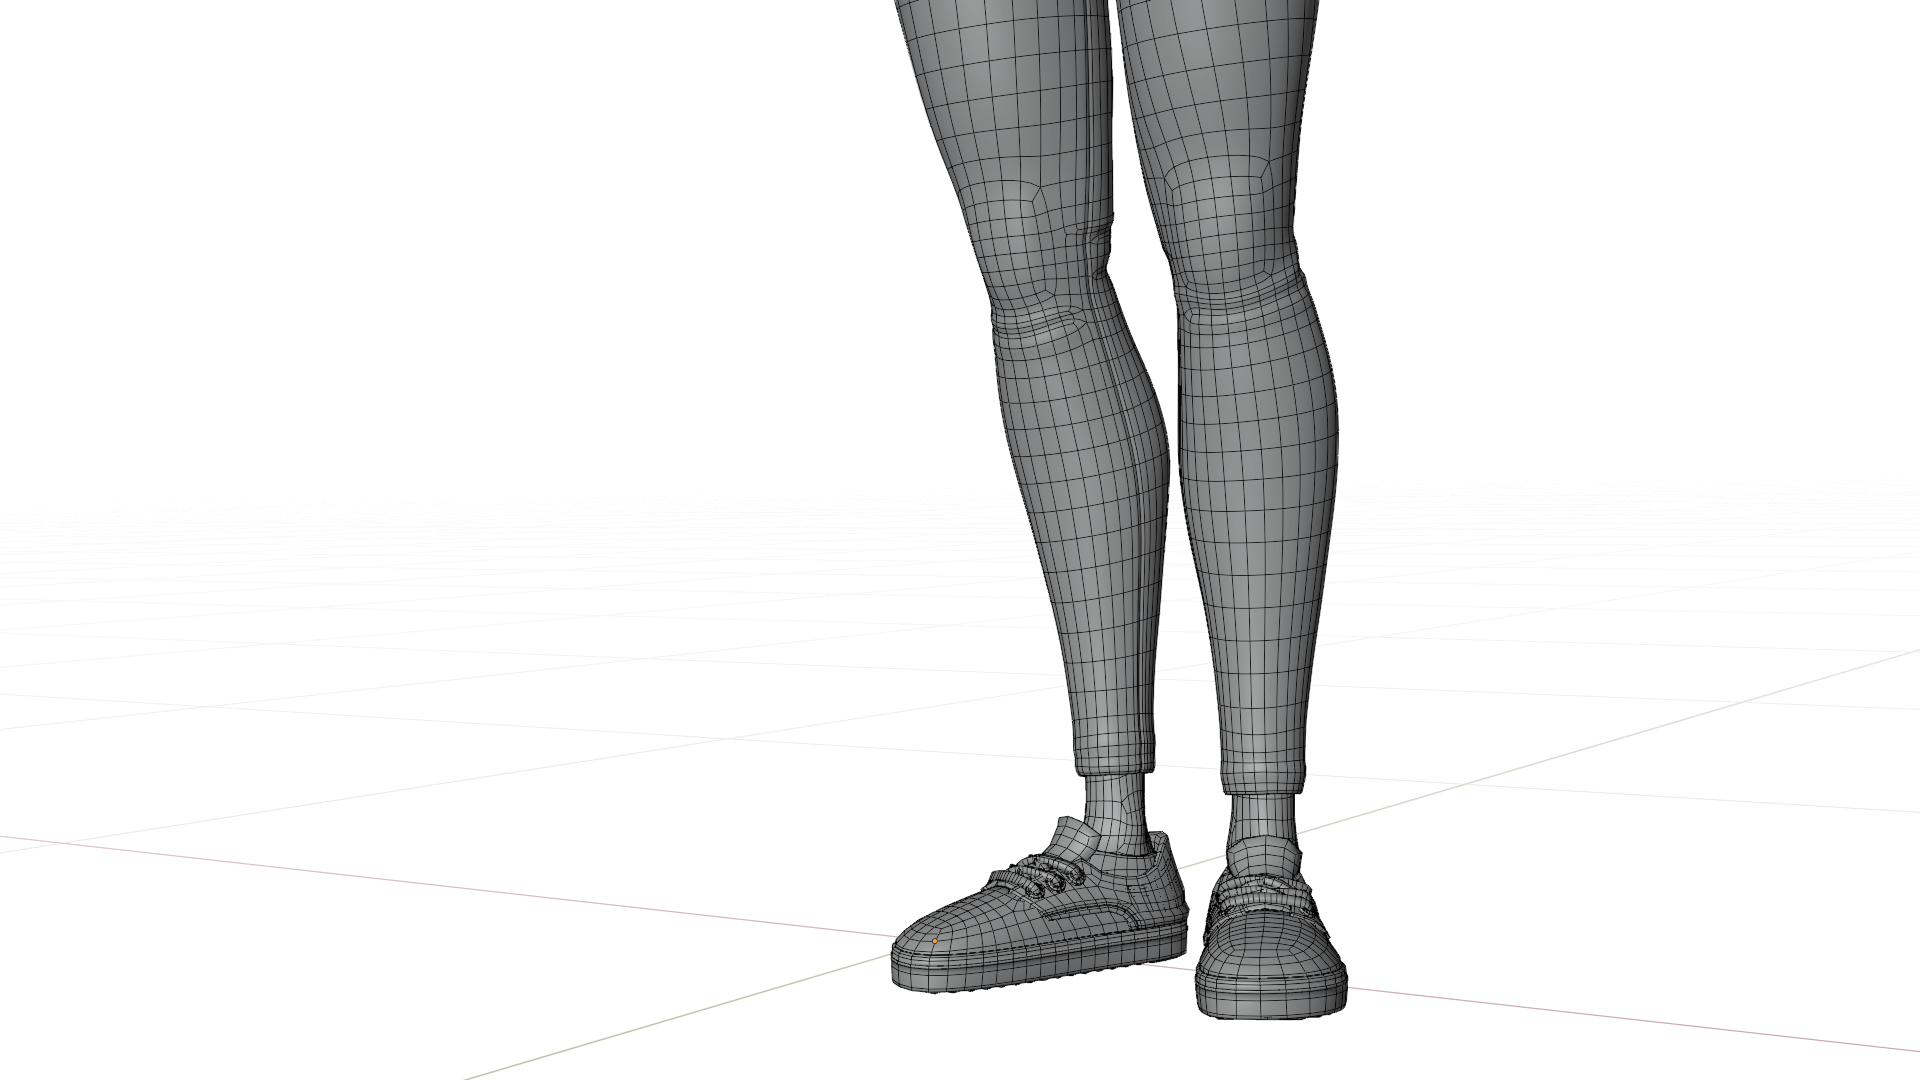
Look how the density above increases in the knee and ankle. This ensures that when the leg bends, there isn’t excessive stretching or artifacting.
Have any tips of your own? Leave them in the comments below! Also, If you enjoyed this post, please consider supporting the site on Patreon to help pay for some of the costs of running the website!