Creating a Chamfered Circle
This time I’m going to show how to model a chamfered circle. I spent a fair bit of time on this one, trying to find a simple method for modeling the shape, and I think I found the simplest one. It’s not ideal (a few ngons), but the other methods I’ve found to be overly complex with too little payoff. Let me know if you have an even better method because I’d love to see it. 🙂
1.
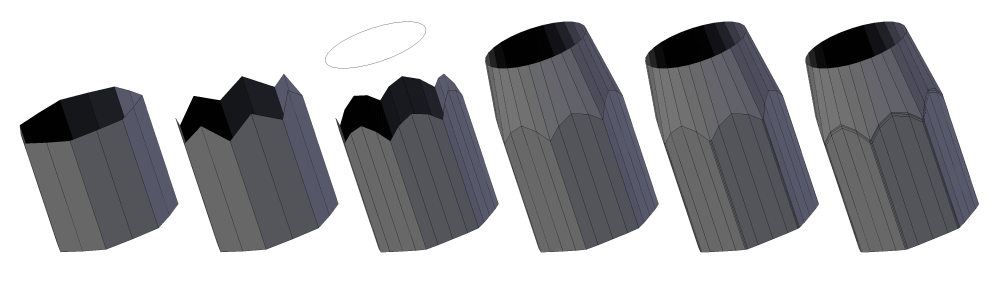
Begin by creating a circle with a low edge count, in order to give a chamfered look. Then add a loop between each edge for the next step.
2.
Next, pull the middle top vertices up in order to begin creating a rounded top.
3.
Now bevel the center loop to complete the rounded look. Feel free to use as many segments as needed. Next, add a new circle above the mesh with the same edges count as the loops of the main mesh.
4.
The two loops can now be bridged by using the “bridge edge loops” tool in the edges menu (CTRL+E)
5.
Next, select the corners of the chamfered section and bevel them. Be sure not to bevel the top edges, so that the circular top maintains its shape.
6.
The last step is to add holding edges to all the sharp corners and add sub-surf as desired.
That’s it! See you in the next guide!