Dealing with Mesh Artifacts in Subdivision Modeling
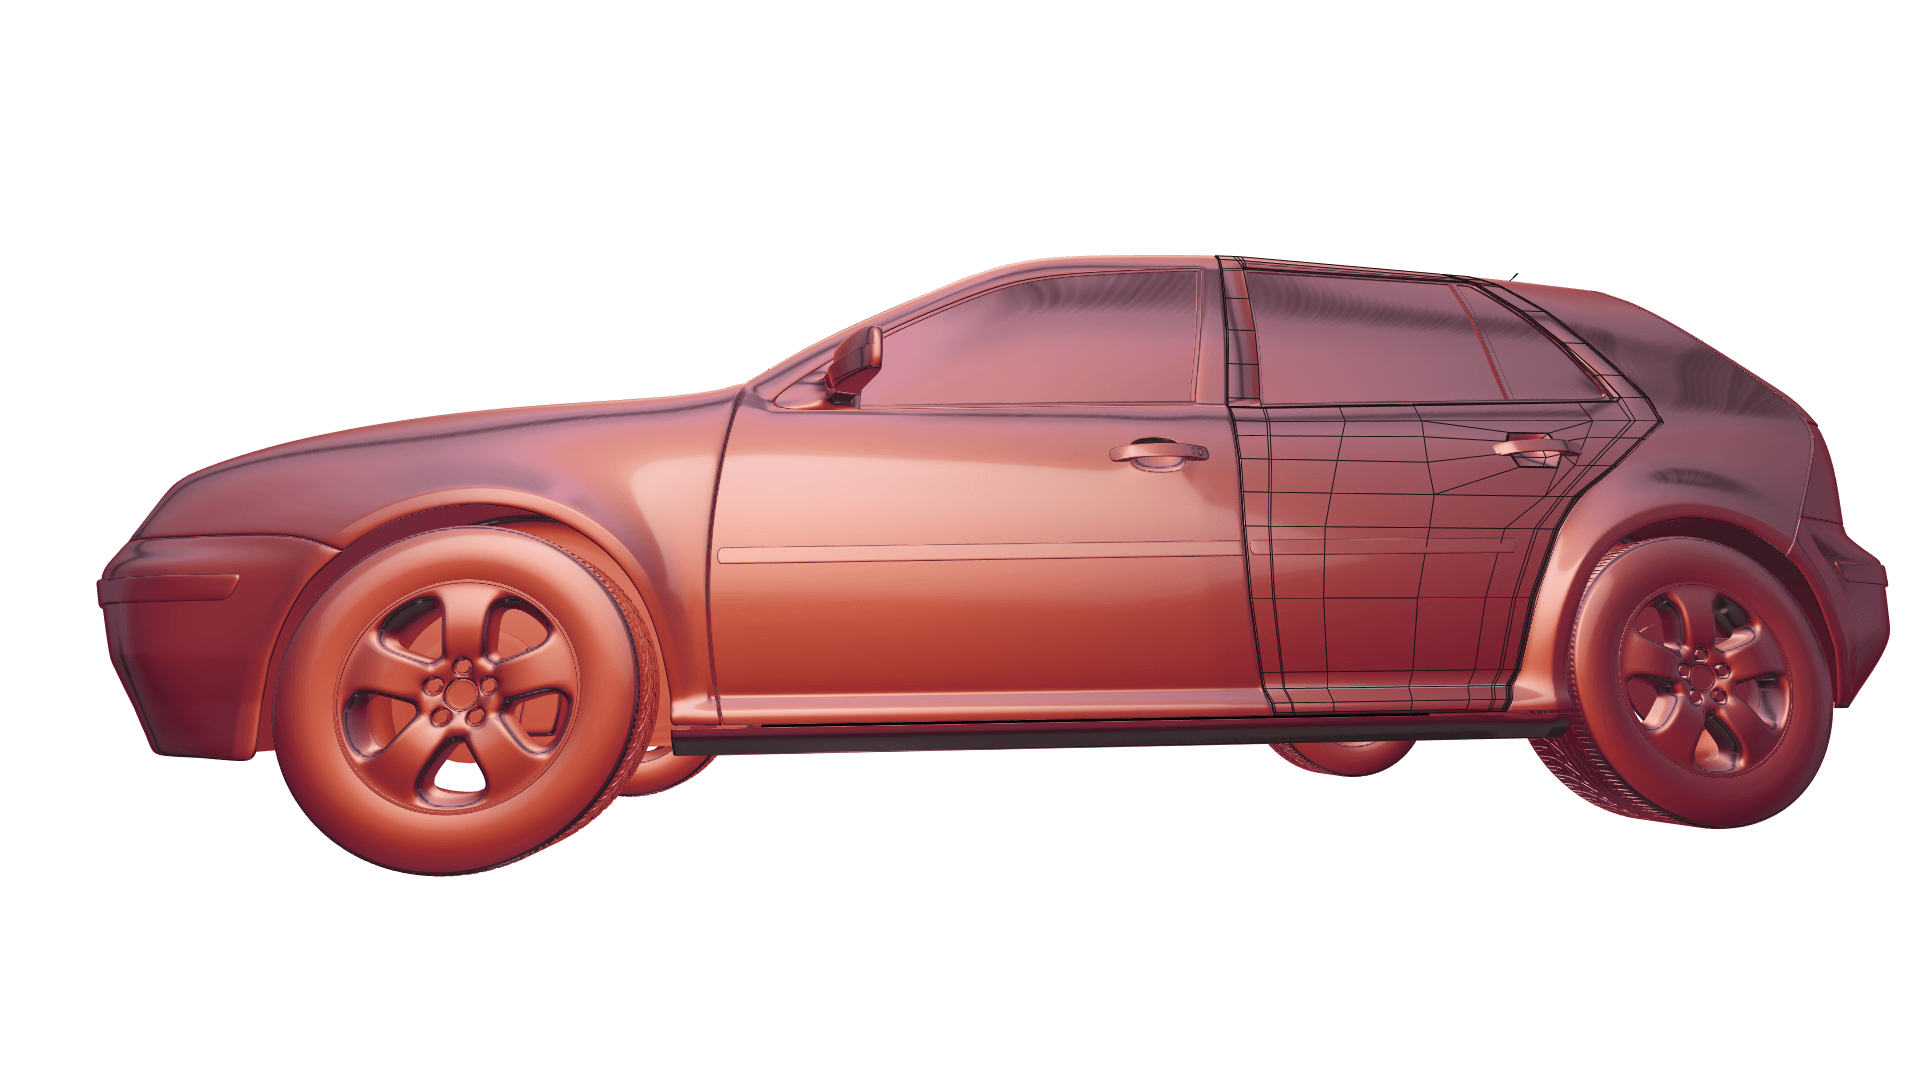
If you’ve ever tried to model a car or any other shiny object, you know how hard it is to get perfect reflections outside of using CAD programs. It’s tedious and virtually impossible to get 100% right.
With that in mind, I thought I’d talk about modeling specifically for these types of surfaces and the best ways to make it as painless as possible. Regularly used subdivision modeling methods rarely have the level of precision needed to make these kinds of surfaces, so I’ll be covering how “hack” sub-d modeling to best apply A-class surfacing ideals to the practical methods of subdivision modeling.ideals to the practical methods of subdivision modeling.
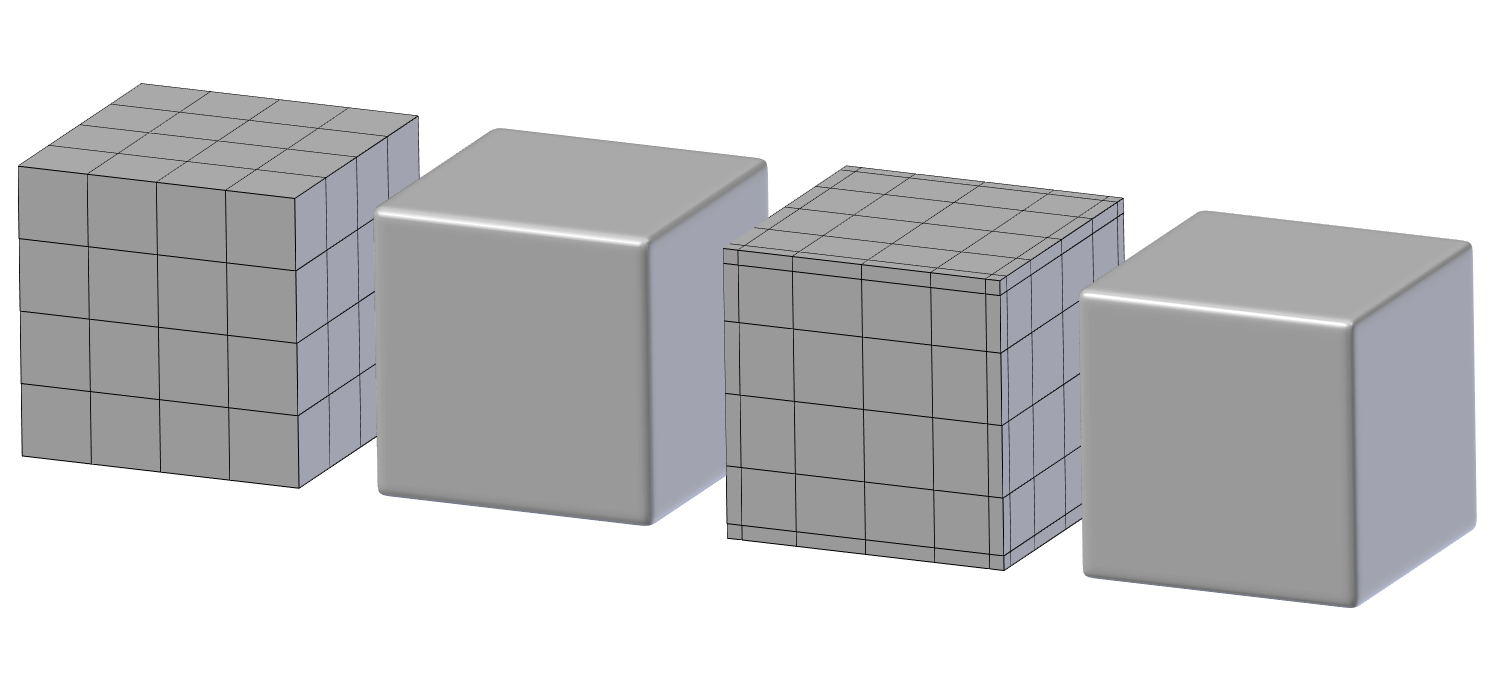
Evenly and Sparsely Place Loops
Even spacing, while often unavoidable without adding useless edge loops, is a goal worth pursuing. Even spacing ensures curvatures stay correct by not introducing any irregular areas that might produce artifacts.
Because of the way subdivision surfaces smooth and subdivide, even adding an extra edge loop that “seems” to follow the surface of your model can cause minute distortions to reflections if placed incorrectly. This is why it’s best to keep the mesh as minimal as possible, for as long as possible. Keeping the mesh simple so you can understand what your topology is doing.
Minimize High-Density Edge Poles
Edges poles are well known for creating mesh artifacts and distortions. But they are often unavoidable in certain areas without sacrificing another part of the model. That’s why it’s best to move poles to areas of less importance or curvature to make them less noticeable, rather than detrimentally removing them. Remove any unneeded poles if possible, but fall back to moving them if you can’t remove them.
A big request has been for a post covering moving poles, so I’ll hopefully be working on a full guide covering this soon.
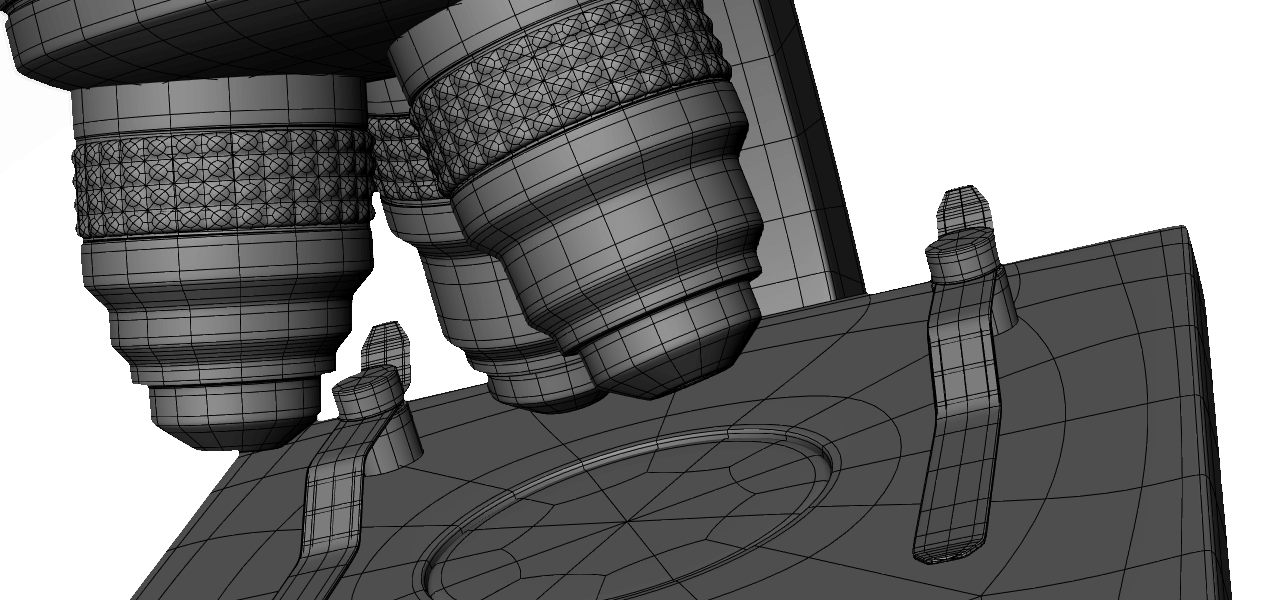
Make Curvature Contradictions After Finalization
Curvature contradictions, meaning things like door handles on a car, or buttons on a control panel can cause major problems with topology and reflections. The main problem is that these contradictions can almost never be isolated without either large amounts of holding edges or creasing with very high mesh density.
 To solve this problem, it’s best to add contradictions after one or two levels of subsurface smoothing have been applied. This way, the curvature is finalized before it can be altered negatively by any additional edits.
Don’t use Holding Edges when Possible
While holding edges are a great thing, they almost always cause distortion on some part of a model by adding edges along the entire length of the area the loop runs. The alternative is to use creasing when possible.
 Creasing, especially at high subdivision levels has almost the same effect as holding edges and can create topology that is much cleaner and easier to manipulate because it uses the extra subdivision of sub-surf.
Non-Destructive Sub-Surface
One benefit of non-destructive subdivision surfaces is that you can preview how the surfacing will look without finalizing it. This is an invaluable benefit of sub-d modeling that other modeling methods often lack.
Previewing how subdivisions will affect your topology is vital to making sure there are no distortions in your mesh. Because like I’ve said before, you never really know how it will be transformed by sub-d smoothing.
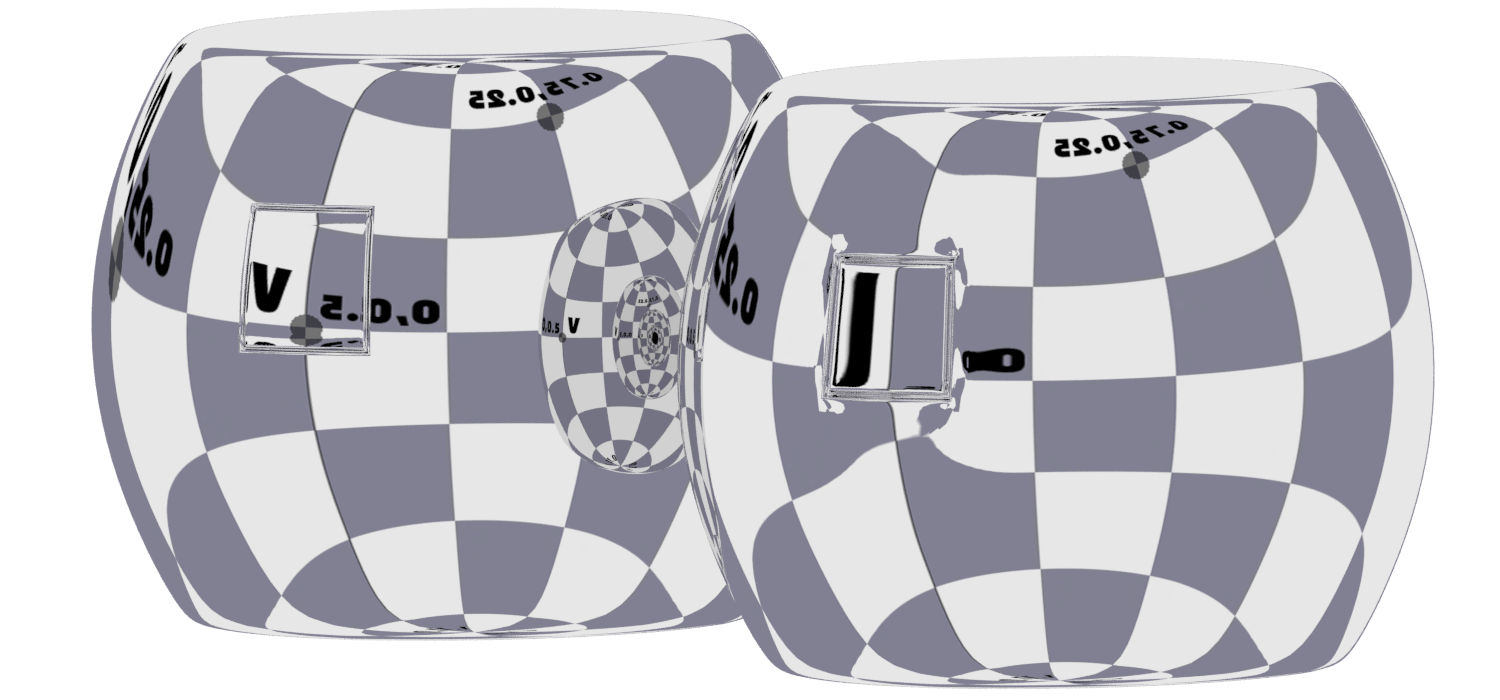
Use high contrast Materials during Modeling
One of the main difficulties in creating perfect reflections is previewing those reflections inside modeling apps. The default Matcaps built into 3d viewports are too low contrast to notice minute imperfections. That’s why using high contrast Matcaps or patterned reflection maps is a good idea for noticing things one normally wouldn’t.
 Depending on your software of choice, you might have a Matcap viewer available or some other way to change the viewport material. If all else fails, a fallback is to render a preview of your mesh with a checkered map set as your environment texture.
That’s all! I hope this gave you some helpful tips for reducing mesh artifacts. But before I conclude, I want to thank CGcookie for graciously sponsoring this post. CGcookie has some fantastic modeling coursework that’s defiantly worth checking for both beginners and advanced artists.
So if you’re interested, check them out by clicking the banner below. :)
